
There’s a lot more than you know when it comes to choosing a replacement door for installation. After selecting a garage door that fits your preference and budget, you’re just halfway to the installation. You have a slew of tasks to carry out, including framing the rough opening of your garage to suit your newly bought door entirely.
Getting a garage door framing done before installation helps your door fit without any lapses against the opening.
You definitely don’t need a door installed in a rough opening that will make it feel out of place. The garage door framing also helps you handle hardware, just like the track and spring, without getting worked up. For a garage door framing that will save your precious time, money, and stress, hire Supreme Garage Door for speed and accuracy.
Supreme Garage Door Step-By-Step Instructions
There are some easy-peasy step-by-step instructions to guide you through the garage door framing process while you flaunt your DIY skills.
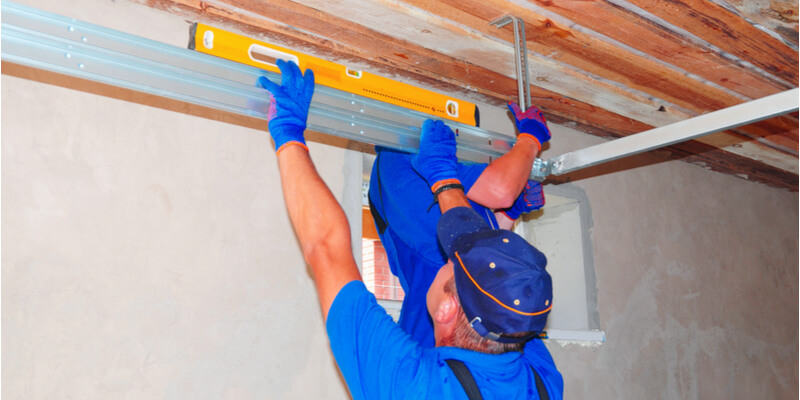
To get on with your garage door framing task, you’ll need a measuring tape for all the length, and breadth recordings, a pencil, a band saw, and some wood, 2-by-6 inches precisely. You can also make do with PVC door jambs if nature has no woods available around you.
Wood is required in substantial quantity for twice the length of your garage’s full height, from floor to prime, and also twice the height of each side of the rough opening.
For this DIY project, you have some quality wood in your possession to deck the width of the header and the gap difference between the header and the top of your garage.
The sort of material to use largely depends on the dimensions of the finished opening. The thickness determines how big the gap is after the garage door framing.
-
The right measurement
Just before you proceed with garage door framing, make sure the rough opening is larger than the door you have purchased. The gap difference between the ground and the opening should be one inch and a half longer than the top of your new garage door. The distance between the garage floor and also the rough opening ought to be only one and a half inches longer than the peak of your new garage. No more, no less. In other words, in a regular seven-foot-tall door, the header must not be more than eight and a half inches longer than the finished floor.
The top header should be wider than the door by nine inches. Ensure the width of the rough opening is only longer by three inches when measured.
-
Install the head door jambs
Head door jambs, in layman’s terms, refer to the planks of wood on the sides of the opening and the top header as well. Generally, the jambs on either side of the opening are often referred to as the “side jambs,” and then the one on the top header is fondly called the “head jamb” by experts.
In order for the side jambs to rest nicely against the top header, install the jambs on the top header before the ones on the side. Take the right dimensions of the header and check to be sure it sits perfectly on the straight opening of your garage, which is not supposed to be above nine inches longer than your door.
Using your special framing pins, attach the two by 6-inch wood or PVC jamb of the correct height to the header.
The thickness of the header should cover the distinction between the rough opening and thus the height of the door.
-
Measure from the ground to the top of your garage
The next step in this DIY garage door framing project is to install two fractions of framing in the rough opening. This is after you must have fixed the head jamb.
These frames will sit well in the opening, fitting your door from top to bottom. You are sure that they will do a great job holding the garage door tracks firmly to the wall. After getting the right height measurements, cut out two pieces of wood with the same measurements.
Using your special framing pins, bind the two chunks of wood very tightly to the interior of your garage wall. Run it up against the jamb header you had earlier fixed.
-
Fix The Jambs On The Sides
Using the same height as that of the opening, cut two fractions of the wood or PVC side jambs and get them ready for fixing. Ensure the side jambs reach the bottom of the jamb header you earlier set. These jambs ought to be the same height as your door with only ¼ inch less, so they don’t hit bottom. Fasten the door jambs firmly with the help of framing nails.
We recommend the use of two-side jambs to support the weight, and you’ll install two trimmers on both sides.
Once you’re done fixing the side jambs, the door opening should match the measurement of your new door.
-
Attach the middle bracket framing
Get the accurate dimensions of the space between the top of the header you’ve fixed to the ceiling. Cut a chunk of wood to this height and center it higher than the header.
As highly skilled professionals with seasoned garage door framing experts in Texas, you can bank on our garage door framing services anytime. Call us to experience speed and accurate door framing service!
More Of Garage Door Repair – garage door pro, door system, garage door motors, garage door repairman, door installation and more…